top of page


Brewing Basics
This section will review some of the steps that influence your coffee brewing from grinding to storing your coffee. We'll briefly cover various equipment, address issues you should look out for, and techniques you can try to help you brew better espresso, steam milk, and store your coffee! If you would like to go further in depth to alternative brewing methods visit our Brewing Methods page, if you are looking for essential, espresso-based recipes, visit the Essential Drinks pages.
Jump to a Section
Grinding
Grinding
When brewing, one of the first things to consider is the type of grinder you will be using. For example, espresso brewing requires your coffee to be finely ground coffee so that it may be tightly packed into a portafilter. If your coffee is not ground fine enough, the pressurized water pushes through the coffee too quickly, resulting in espresso that lacks viscosity and crema. Other methods, such as cold brewing, require the coffee to be coarse. Too fine and your coffee will be muddy and full of grounds. However, grinding is only one piece of the brewing puzzle, let's break it down in this section.
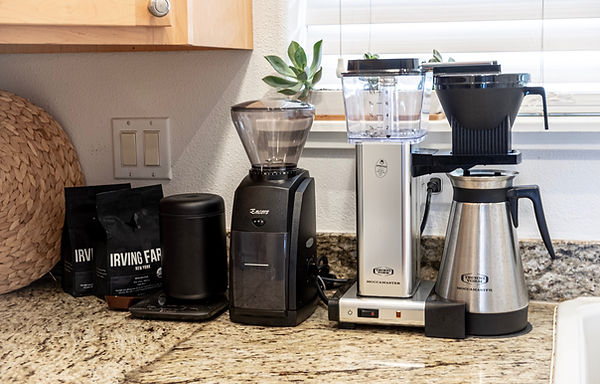
Ideally, you will want an espresso grinder with multiple adjustments that allows you to choose a grind size, although it can be more challenging to keep track of your setting and size. Espresso grinders typically come in two types: single-dose grinders and hopper-style grinders. Single-dose grinders are the most common for at-home baristas, ideally giving you the same amount of coffee you put in (you will need to be mindful of grind retention) and larger hopper-style grinders that have two ways of measuring grind volume: Grind-by-Weight (GbW) or Grind-by-Time (GbT).
Grind-by-weight grinders exactly as you think they do. Simply set the desired weight in grams, hit the grind button, and you'll have just the amount of ground coffee needed for the portafilter. Grind-by-time grinders are most common and do a fine job of achieving the desired weight but can often be frustrating to use. These grinders work by setting the amount of time you want to grind and require you to adjust the time every time you change the grind setting or change type of coffee. Fortunately, most GbT grinders will have a pulse button where you can stop the grind and measure how much you have before pulsing more if needed.

Another issue all baristas and coffee enthusiasts must deal with is static electricity. If you have ever had coffee spray out in multiple directions when grinding, it is usually caused by static. Ways to prevent this include the Ross Droplet Technique, where you spray your coffee beans with water prior to grinding them. This is helpful if using a single-dose grinder.
Unfortunately, this cannot be done if you are using a larger, hopper-style grinder, although they typically come equipped with internal anti-clumping/anti-static measures. Some high-end grinders come with a rubber/metal flap that the coffee grounds push through before coming out of the chute into a portafilter. This flap will slow down the grounds, creating resistance to reduce or eliminate static electricity. It is also possible that static is being caused by a dirty grinder, in which case it will need to be cleaned. Make sure to visit our equipment maintenance page for more information!
Puck Preparation
Puck Preparation
In order to create the perfect shot of espresso one first needs to perfect the preparation of the espresso puck. This brewing step is one of the most difficult to master since it greatly influences the extraction and taste of the espresso shot. Although there are tools and steps that may not be necessary, practicing them will help you master espresso preparation and create better tasting beverages. After all, coffee brewing is a skill, and you'll only improve if you practice and stay consistent with preparation. Only you know how to craft the perfect espresso for you, so choose the preparation steps that best suit your preference and stick with them. As your skills develop, you can make small adjustments and try new tools and tricks. Below, we'll outline some of the basic steps that go into espresso puck preparation.

Before we can start thinking about puck preparation, we'll have to go over basket sizes in portafilters. Baskets come in three sizes: single (6-10 grams), double (12-10 grams), and triple (18-20 grams). Most will use a double, although some baristas use a triple for larger drinks. Remember to use the portafilter basket that corresponds with your drink of choice. Using a basket that is too large or small will create issues during extraction and result in inconsistent brews.

Once you have the appropriate basket size and amount of coffee for your beverage, you can start thinking about grinding. As mentioned in the previous section, there are few issues to watch out for in this step such as static electricity. Remember that if you are using a single-dose grinder, you can use the Ross Droplet Technique (RDT) to spray water on your coffee beans and shake them gently to reduce static and prevent grinder retention. However, the RDT will not work on larger hopper-style grinders.

Recent trends have introduced new tools and tricks one can use to create the perfect espresso. Among these are paper filters that you can place at the bottom of your portafilter basket before adding the coffee. These filters decrease channeling, increase overall extraction, and decrease sediment in your cup. The paper filters are made with creped paper that has a rough side and a smooth side. If you are using them always place the rough side of the paper facing down so that it touches the bottom of the basket.
Another popular technique to use when preparing espresso pucks is the Weiss Distribution Technique (WDT). Distribution tools have stainless steel needles that allow you to reduce clumps and evenly distribute the grounds to enhance extraction. This, used along with a dosing ring, also helps reduce mess.

After all this, you're ready to tamp and start brewing! Remember to always apply 30lbs. of pressure when you tamp your grounds in order to hit "maximum density." Applying more pressure won't affect your brew, but applying too little will result in inconsistencies like channeling. Before pulling your espresso, you can also add a metal mesh filter that helps evenly distribute the water to further reduce channeling and improve saturation.
Extractin Espresso
Extracting Espresso
Now that you've gone through an extensive list on puck preparation, you're ready to move onto extraction. The next section will briefly go over what you should look for during extraction. Although it is difficult to provide a rigid set of advice since all coffee is different and brewing methods vary, a basic understanding of the factors that affect your extraction will help you develop your skills.

Most of what will end up in your cup will be water, meaning you'll want to use quality, well-balanced water when brewing, such as filtered spring water. The next thing to consider is your volumetric setting, which will depend on the choices you make while preparing your espresso puck (i.e. basket size, amount of grounds, etc.). All of this, along with your recipe choice, will determine if you need a single shot, double shot, or a custom setting.
Most machine has simple volumetric settings where the extraction stops after a certain amount of time has passed or after a certain amount of water passes through the group head. There are also machines that have manual overrides or on/off valves that require you to pay closer attention to the time and weight of your extraction.

Another factor that will influence the taste of your brew is temperature. Make sure you note what type of roast you are using to adjust the temperature accordingly. The listings below are suggested ranges:
Light Roasts: 199–205°F (93–96°C)
Medium Roasts: 194–200°F (90–93°C)
Dark Roasts: 188–194°F (97–90°C)
The next factor to consider is pressure. Most home espresso machines will push to and hold 9 bars of pressure while brewing (this may be slightly lower during pre-infusion, when your puck is saturated at a lower pressure). If your machine has a pressure gauge, you can check to see if your machine steadily holds around 9 bars of pressure. If your machine cannot steadily hold 9 bars, it may be due to channeling in your puck, an underdosed basket, or the grind size is too coarse. If your machine is hitting more than 9 bars, it may be struggling to penetrate the puck because it's too thick, or your grind size is too fine.

The standard time for espresso extraction is about 30–35 seconds. When observing the appearance of your extraction, look out for early blonding, stalls, and tiger striping. When preparing a shot of espresso, its color will transition from dark to light, this is referred to as blonding. If it blondes too early, it can indicate issues with puck preparation or channeling where water flowed too quickly through the grounds. Early blonding will cause your espresso to lack crema, will be under-extracted, and taste sour. Stalls in espresso brewing occur when the grind size is too fine or too much coffee was packed into the basket, making it difficult for water to pass through the grounds. Tiger striping refers to dark and light stripes that are visible in the crema. This likely indicates uneven extraction (dark stripes indicating slow extraction, light stripes indicate fast extraction).

At the end of the day, what matters most if the taste of your espresso. Regardless of how the shot turned out, it is important to taste it even if you know it wasn't brewed correctly. Tasting your extractions will help you identify improperly brewed espresso and see how to taste compares to properly brewed espresso. If the taste is not quite what you expected, you can adjust and monitor as your methods as you perfect them with practice.
Steaming & Frothing
Frothed milk is made by aerating milk, meaning it's made by adding air bubbles. This is done to achieve a certain texture that adds a creamy mouthfeel to your drinks. Foam is also an essential component to drinks like cappuccinos.
Steamed milk, on the other hand, is always hot and produces micro-foam. When steamed, the milk becomes slightly aerated and will have a velvety texture.
Steamed milk is key when making drinks like lattes and mochas, using the micro-foam is to create latte art.

When steaming milk, it's important to know what you are working with. In general, whole milk is still a preferred choice when making latte art. For those with dietary restrictions, oat milk is a great alternative. There is also almond, coconut, and soy milk which are harder to shape into typical latte art due to their density and slightly different scaling temperatures. Skim and 2% are other choices that will steam and foam well but tend to form bigger bubbles that you'll have to shake out before pouring it into your coffee.
No matter which type of milk you are using, it's best to heat to 140ºF, but not go beyond 160ºF. Milk starts to scald once its heated past 160ºF, which will cause it to curdle and ruin the texture. It's always recommended to use a thermometer when steaming milk, even as a seasoned barista. Make sure you also only use as much as you need, as milk doesn't reheat very well. Below we'll outline the essential steps of steaming milk using an espresso machine as well as other alternatives.

If you are using an espresso machine, you'll start by filling your pitcher with milk. Make sure to fill it up to the lower nudge of the spout. This will help you produce better steamed milk and conserve it. Once your milk is poured, you can place the nozzle of the steam wand just below the surface of the milk and begin heating it. The steam will produce a hissing noise and the milk should spin in a whirlpool motion. During this first stage, keep the nozzle just below the surface of the milk to produce foam (about 5 seconds or so).
Then dip the nozzle just a little further below the milk and maintain the whirlpool motion. At this point you'll be producing micro-foam and polishing off the milk. Keep doing this until the pitcher becomes hot to the touch, turn off the steam, and wipe the wand.
Before pouring, give the pitched a solid thump on the counter to disperse any large bubbles. Afterwards, swirl the milk around the jug a few times to polish it off and begin pouring.

There are other alternatives to steaming and frothing milk if you don't have an espresso machine at home:
Microwave: This is a quick and easy way to make frothy milk. As always, we recommend you use a thermometer for this step to make sure the milk is heated to no more than 150°F. You can use a microwave safe container and fill with about 1/4 cup of milk. Microwave it for about 20–30 seconds (if you're using more milk, you'll need to increase the time). Once done, check the temperature and increase/reduce the time depending on its final temperature. If you want your milk, extra foamy you can also use a milk frother.
Stovetop: This method will give you more control over the temperature but requires more work. You can start by adding your milk to a small pot and placing it over low-medium heat (milk scalds easily so you'll have to watch the temperature closely). Stir the milk gently until it reaches 140–150°F, this can take 1–3 minutes. Finally, you can froth your milk with a whisk and spoon the foam over your coffee.
Mason Jars: This method is helpful because it allows you to heat the milk and froth it afterward. All you need is a microwave and jar. First, you'll fill the jar with 1/4 cup of milk. Leave it uncovered and heat it in the microwave for about 20–30 seconds. Make sure the temperature is no more than 150°F. Once it's ready, cover the jar and shake it until the milk has doubled in size or you have your desired amount of froth. Add it to your coffee and enjoy!

Steaming & Frothing
Storing Coffee
Storing Coffee
Airtight containers are best for storing beans and ground coffee since they help keep out air and moisture. Air and moisture cause coffee to lose its flavor and can cause mold. It also helps if your container is opaque so that it keeps out light. If your container is clear, you can always store it in the pantry or in area that isn't hit by light or heat. In a similar way to air and moisture, light will also dull the coffee's flavor by breaking down its compounds. You can always use the bag your coffee came in if you have a way of tightly securing it, but it may be more convenient and easy to simply use airtight containers instead.

In general, it is recommended to always buy whole bean coffee. Coffee begins to lose its flavor once ground, so storing it like that for long period of time isn't ideal. It's best to grind your coffee just before brewing in order to get the best flavor.
Whether you get your coffee at the grocery store or directly from a local roaster like IMACK, make sure to check the date it was roasted! It is recommended to let coffee rest for 24-48 hours after roasting to allow it to de-gas. After this period, it's best to use your coffee within a month before they begin to go stale. If your coffee was roasted over a month ago or has no roast date, it's best to avoid it and find an alternative.
In the event that your coffee does go stale, not all is lost! You can use stale coffee to make cold brew, home-made body scrubs, or arts and crafts like stained paper. You can also use stale grounds as fertilizer or place a bowl in your fridge to soak up odors (similar to baking soda).

Although you will find that most, if not all articles say that you should never freeze coffee beans, all will end by saying that there is no issue with freezing coffee beans as long as it is stored properly like any other perishable and only taken out when you know you'll be using all of it. It's not our first choice for storage and it won't prolong freshness forever, but it can be an option.
We can all agree that fresh coffee is best, but if you buy coffee in bulk and know that you won't be using it all at once, it can be easier to store any extra portions in the freezer. Freezing your coffee won’t change the brewing process but will impact the flavor and freshness of your beans if stored improperly. If you must freeze your beans, be sure to store them in an airtight container away from the freezer door in order to avoid exposing the coffee to any air, moisture, and temperature fluctuations. You can store your beans in multiple containers with the amount you need for a week at a time. You can take a week's supply, move it to the pantry to thaw, and use it within two weeks for optimal flavor.
However, we will say that we agree with the consensus that you should avoid attempting to freeze coffee grounds. Coffee begins to grow stale as soon as it is ground and should be used as soon as possible for optimal flavor. Additionally, if storing beans in the freezer, never store coffee openly or in the bag it came in, it will absorb odors and the bags are not airtight. Avoid the refrigerator altogether since there is too much moisture in that environment.

bottom of page