top of page


Brewing Methods
Are you just starting out in your home brew journey or are you interested in learning a new brewing technique? We've got your covered with these simple guidelines detailing six common methods of coffee brewing. We'll be covering everything from espresso to cold brew so that you can find the method that best suits your needs and skills.
Remember that every machine is different, consider these steps as flexible guidelines rather than strict rules. There are many factors that will affect your brew from water source, grinder type, and the type of coffee you are using (origin, roast, processing method). You can adjust the steps as needed for your tastes and coffee type. After all, the best type of coffee is the one best suited for you!
Click a button to jump to a section.
Espresso
Espresso
Equipment
-
Espresso grinder
-
Espresso machine
-
Tamper
-
Distribution tool
-
Scale
-
Timer

Preparing the Espresso Puck
Creating the perfect espresso puck is one of the most difficult skills to master. Use a distribution tool to remove clumps and level the grounds for an even extraction.
Tools you can use to ensure better extraction include: portafilter paper, a weight distribution tool, or a puck screen. When tamping, you should use 30 lbs. of pressure.

Serve and Enjoy!
Once brewed, you can enjoy your espresso as is or steam some milk to create a milk-based espresso drink!

Measure and Grind Coffee
When grinding, aim for a fine consistency. The real test is running it through your espresso machine, so it may take some trial and error.
Each espresso machine and portafilter are different, check your machine's capacity to avoid overfilling your portafilter. A standard suggestion is to start with 18 grams of coffee for a double shot of espresso.

Lock and Extract
Once your grounds are properly tamped and you've added extra screens (if needed), you can lock the portafilter. Press the button for the type of shot you want to pull (most machines have several, including ones for a single and double shot). For 18 grams of coffee, you should pull a 36-gram double shot between 30–35 seconds.

Pour Over
Equipment
-
Espresso grinder
-
Pour-over device
-
Pour-over filter
-
Gooseneck kettle
-
Scale


Measure and Grind Coffee
For this method, aim for a medium coarse grind. You can adjust the grind size to be finer if the coffee brews too quickly, or coarser if it brews too slowly. A standard suggestion is to start with 15 grams of coffee that will brew for 3 minutes.
Rinse Filter
Place the brewer and filter on top of your mug or carafe to rinse the paper filter. This is to avoid a paper-like taste and warm up the device.

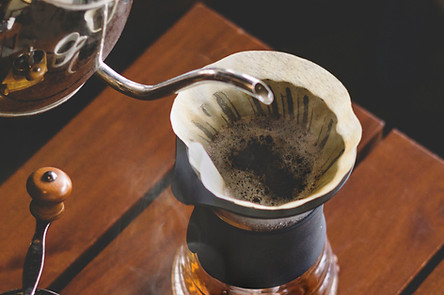
Blooming
The first pour is called "the bloom." This allows the coffee to degas and helps achieve an even extraction. For the first pour, use 3–4x the weight of the coffee in water (45–60 grams). Make sure to saturate all the grounds. This step should take anywhere between 30 seconds to 2 minutes, depending on the coffee you are brewing.
Add Coffee, Heat Water
Measure your coffee and add it to the filter, you should be using 15 grams. Heat your water, you should be using 240 grams. Heat it to the ideal brewing temperature for your roast type (hotter for light roasts, cooler for dark roasts).


Pour
After blooming, pour the remaining water over the grounds. Pour it at 6–8 grams per second until you hit the final weight (240 grams). If the coffee is draining too slowly, you can swirl the bed of coffee to help the flow. Note: The way you pour will affect your brew. A long slow pour is recommended to keep the grounds from cooling too much as you brew.
Serve and Enjoy!
Once brewed, you can enjoy a delicious cup of coffee! Don't be afraid to adjust your grind size or brew length to suit your tastes and roast type!

Pour Over
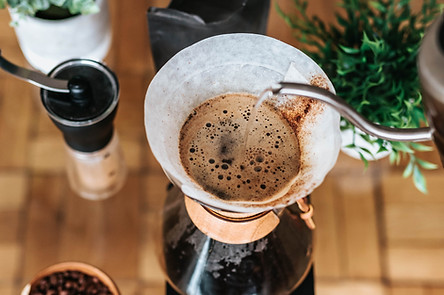
Chemex
Equipment
-
Espresso grinder
-
Chemex brewer
-
Chemex filter paper
-
Gooseneck kettle
-
Scale


Measure and Grind Coffee
When using this method, you should aim for a medium coarse grind. Start with 45 grams of coffee. You'll want a coarser grind than you use for pour-overs due to the Chemex filter paper being thicker.
Rinse Filter
Just as you would with a pour-over, rinse the Chemex filter. This will prevent the coffee from tasting papery and heat up te carafe.


Add Coffee, Heat Water
Measure out your coffee and add it to the filter.
Afterwards, heat 700 grams of water to the ideal temperature for you roast type (hotter for light roasts, cooler for darker roasts). With a Chemex, it is ideal to brew slightly hotter to help with extraction.
Blooming
The first pour is "the bloom." It allows your coffee to degas and helps achieve an even extraction. It is recommended to use 3–4x the weight of the coffee (45–60 grams) in water for the first pour. Make sure you saturate all the grounds in coffee bed. Recipes recommend the blooming stage last between 30 seconds to 2 minutes, depending on the coffee you are brewing.

Remaining Pour
Once the bloom is complete, pour the remaining water at a slow and even pace. This will last between 2 minutes to 2 minutes and 45 seconds. Note: The way you pour will impact the brew. It is generally preferred to use a long and slow pour lasting between 1 minute to 1 minute and 30 seconds. Allow another minute or minute and half for the coffee to fully drain. Your total brew time will be 4–5 minutes.
Serve and Enjoy!
Once brewed, you can enjoy a delicious cup of coffee! From here you can reassess anything that affected its taste, such as the grind size or brew length. Before serving, remember to give your Chemex a stir. The initial extraction of coffee tends to settle at the bottom of the carafe, which will affect taste.

Chemex
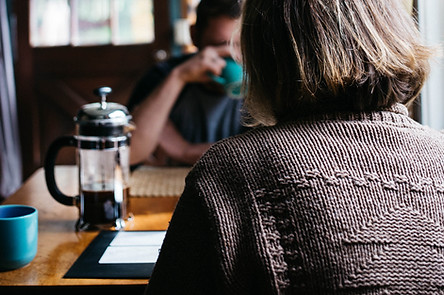
French Press
Equipment
-
Espresso grinder
-
1 Litre French Press
-
Kettle
-
Wooden spoon
-
Scale

Heat Water, Add to French Press
You'll need about 1,000 grams of water. Make sure to heat it to optimal temperature based on your roast type. Once heated, pour all of the water into the French Press and set a timer for 3 minutes and 30 seconds. You can leave the lid/filter off at this time or attach it without pressing the plunger to help it retain heat.

Attach Filter and Plunge
Allow the coffee to sit for another 30 seconds after you stir and skim. Then attach the filter and slowly plunge, going slow will prevent sediment from pushing through the mesh filter.

Measure and Grind Coffee
When grinding, aim for a coarse consistency. Too coarse and the coffee will taste sour, too fine and your cup with be muddy. Start with 65 grams of coffee. Before adding the coffee grounds, give your French Press a splash of hot water and dump it out to heat the device. This will improve extraction.

Stir and Skim
For this step, remove the plunger if placed during the brew period. After 3 minutes and 30 seconds have passed, stir the coffee with a wooden spoon. The coffee will sink, and foam will rise to the top. Skim the foam with a spoon and discard before plunging, this will help make a cleaner cup of coffee.
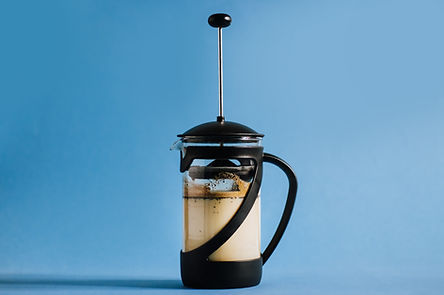
Press and Enjoy!
Once brewed, you can enjoy a delicious cup of coffee! Adjust anything as needed based on your roast type and tastes, such as the grind and brew time. You can clean the French Press by adding water to the grounds, dumping them in the trash, and rinsing out the device.
French Press
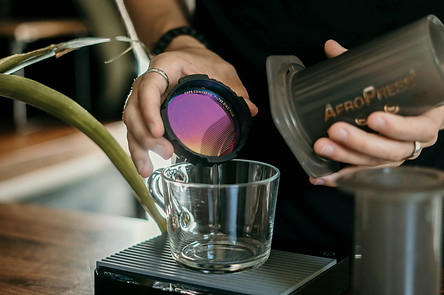
Aeropress
Equipment
-
Espresso grinder
-
AeroPress brewer
-
AeroPress filter paper
-
Gooseneck kettle
-
Scale
-
AeroPress paddle/spoon


Measure and Grind Coffee
Begin with 16 grams of coffee. When grinding you should aim for a medium-fine grind. This is ideal for the brew length of 1–2 minutes.
Rinse Filter
Next place your filter paper in the basket with the smooth side facing the coffee and the rough side facing down. Rinse the filter with hot water to help with taste. You can also rinse the body of the AeroPress to heat it up. Screw the filter holder to the bottom of the AeroPress.

Add Coffee, Heat Water
You will need 16 grams of coffee and 230 grams of water for this step. Add the coffee to the AeroPress and heat up the water to the ideal temperature for your roast type (hotter for light roasts, cooler for darker roasts).
Pour and Swirl
Once all is set up, pour the first 50 grams of water into the AeroPress, swirl gently so the coffee and water mix well. This should take about 15 seconds.


Press and Enjoy
Once a minute has passed, gently press down on the plunger. Stop pressing at about 1 cm before reaching the bottom to prevent the extraction of the last bit of coffee. This can result in a murky taste.
Remaining Pour
After 15 seconds, pour the remaining 180 grams of water into the AeroPress. You can swirl the grounds one more time before attaching the plunger. Allow the coffee to sit for 1 minute before plunging. Keeping the plunger on as it sits will allow the brewer to retain heat and aid in extraction.

AeroPress
Cold Brew
Equipment
-
Toddy Cold Brew Coffee System
-
Espresso grinder
-
Toddy paper filter
-
Toddy felt filter
-
Toddy rubber stopper
-
Scale


Measure and Grind Coffee
Use a coarse grind for this method (coarser than the grind used for a French Press or pour-over). If the grounds are too fine, it will clog the felt filter and make the draining difficult. Start with 340 grams of coffee.
Rinse Filters, Add Stopper
If using the felt filter for the first time, soak it in warm water for 1–3 minutes before using. After soaking, wring it out and place the filter on the bottom of the Toddy system. Next, rinse your paper filter and place it inside the Toddy. Finally, add a rubber stopper to the bottom of the Toddy.


Rinse Filters, Add Stopper
Note: It is recommended to rinse the felt filter and place it in a resealable plastic bag in a freezer to prevent bacteria from growing. When using the felt filter again, place it in boiling water for 1–3 minutes, run it through cold water, and wring it dry. These felt filters can be used up to 10 times.
Add Coffee and Water, Mix
Pour the coffee in the paper filter in the Toddy and secure it with a twist tie/rubber band. Using a paper filter is recommended to mitigate blockage of the felt filter. Next add 1,800 grams of water. From here you can leave the paper filter untied to use a wooden spoon to mix the coffee and water. However, this can result in coffee grounds seeping outside and plugging up the felt filter. If you tie the paper filter, remove the air so that it does not float in the water.


Sit for 16-24 hours, Drain
Once you've added the water, it's time to wait. When making a cold brew, it's recommended to allow the coffee to brew for 16-18 hours. You can wait a full 24 hours if you desire a strong and robust cold brew. You can brew in a room temperature environment or place the Toddy in a fridge, there is little to no difference. You can always do a quick taste test to see if you notice a difference in brew times or environment!
Dilute and Enjoy!
The final concoction will be what is considered a cold brew concentrate. You can drink it as is or add 1–2 parts of water or milk to your serving. Refrigerated cold brew without additives will last for 7–10 days.


Recipe suggestions:
1) 6 ounces of cold brew concentrate and 4 ounces of spring water.
2) 6 ounces of cold brew concentrate and 4 ounces of milk or milk alternative.
For in-depth instructions on brewing with the Toddy Cold Brew System, visit the Toddy Product page.
Cold Brew
bottom of page